Method
Mix the rye dough
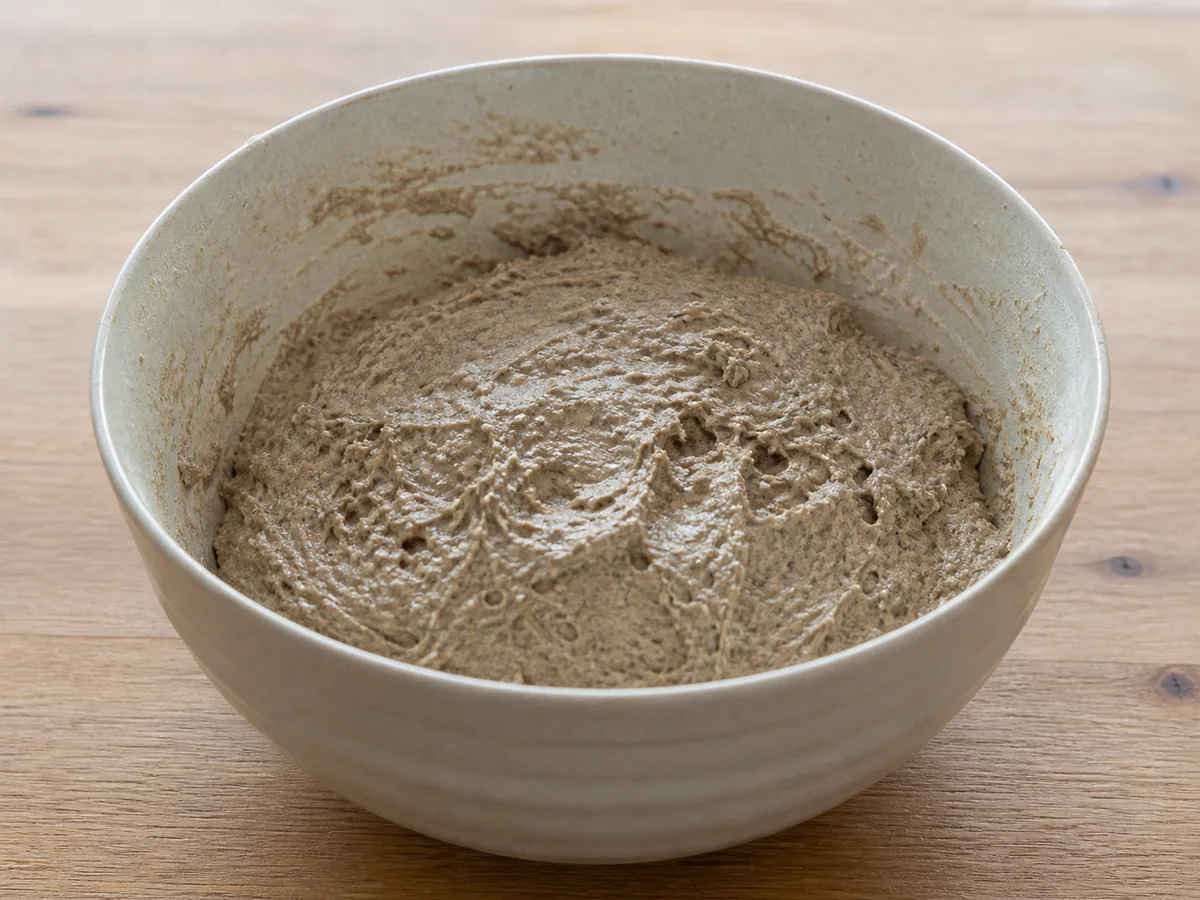
Stir 150 g of active rye sourdough starter into 400 ml of lukewarm water in a large bowl until the starter loosens and the mixture looks cloudy. Add 500 g of whole rye flour and 10 g of fine sea salt. Mix firmly with a sturdy spoon or wet hand for 3 to 4 minutes, scraping the bowl as you work, until no dry flour remains. Expect a thick, sticky paste rather than an elastic wheat dough; do not add extra flour to make it kneadable.
03:00Let the dough ferment
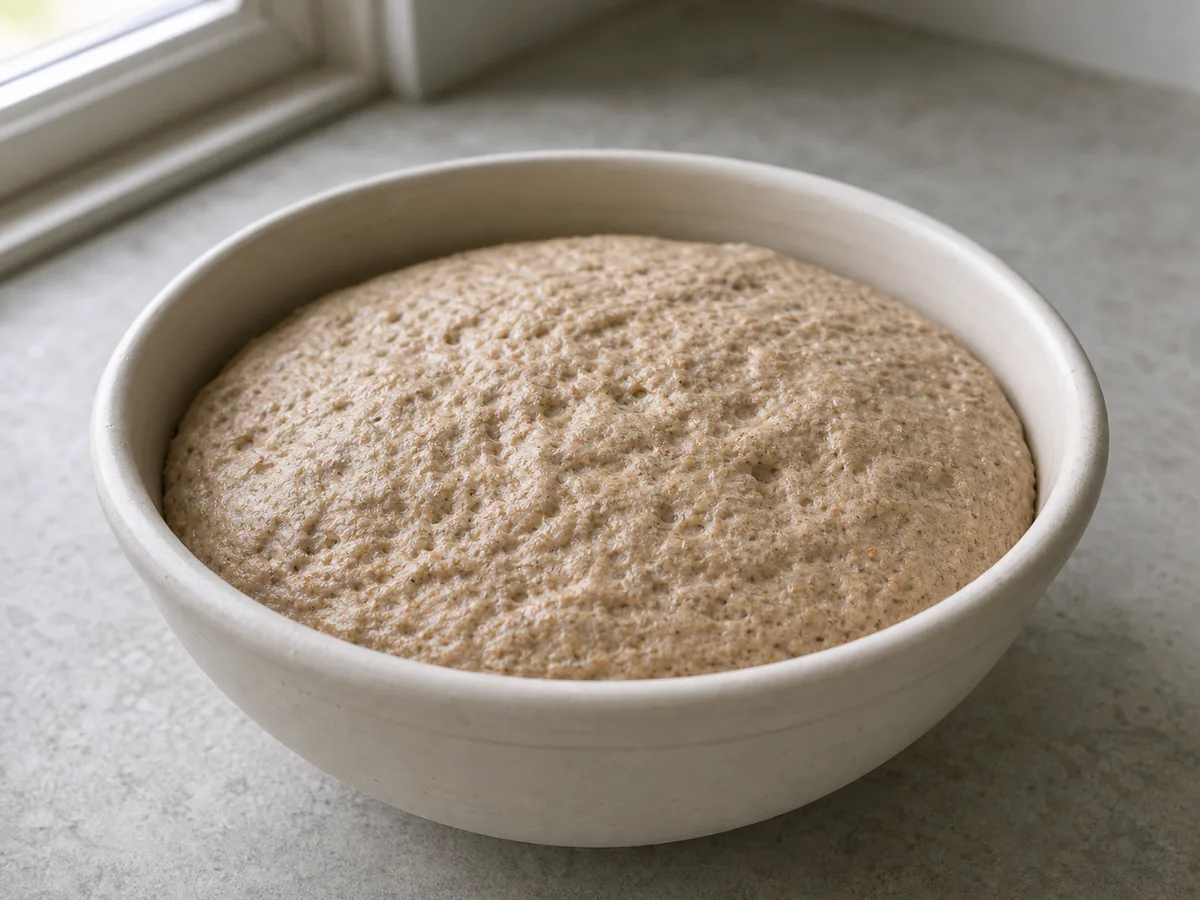
Smooth the surface with a wet spoon, cover the bowl, and leave it in a warm place around 24°C to 26°C (75°F to 79°F) for 3 to 5 hours. Begin checking at 3 hours. The dough is ready when it looks aerated, has risen by roughly one-third, and shows small bubbles or fine cracks across the top; rye dough may not double.
3:00:00Shape and proof the loaf
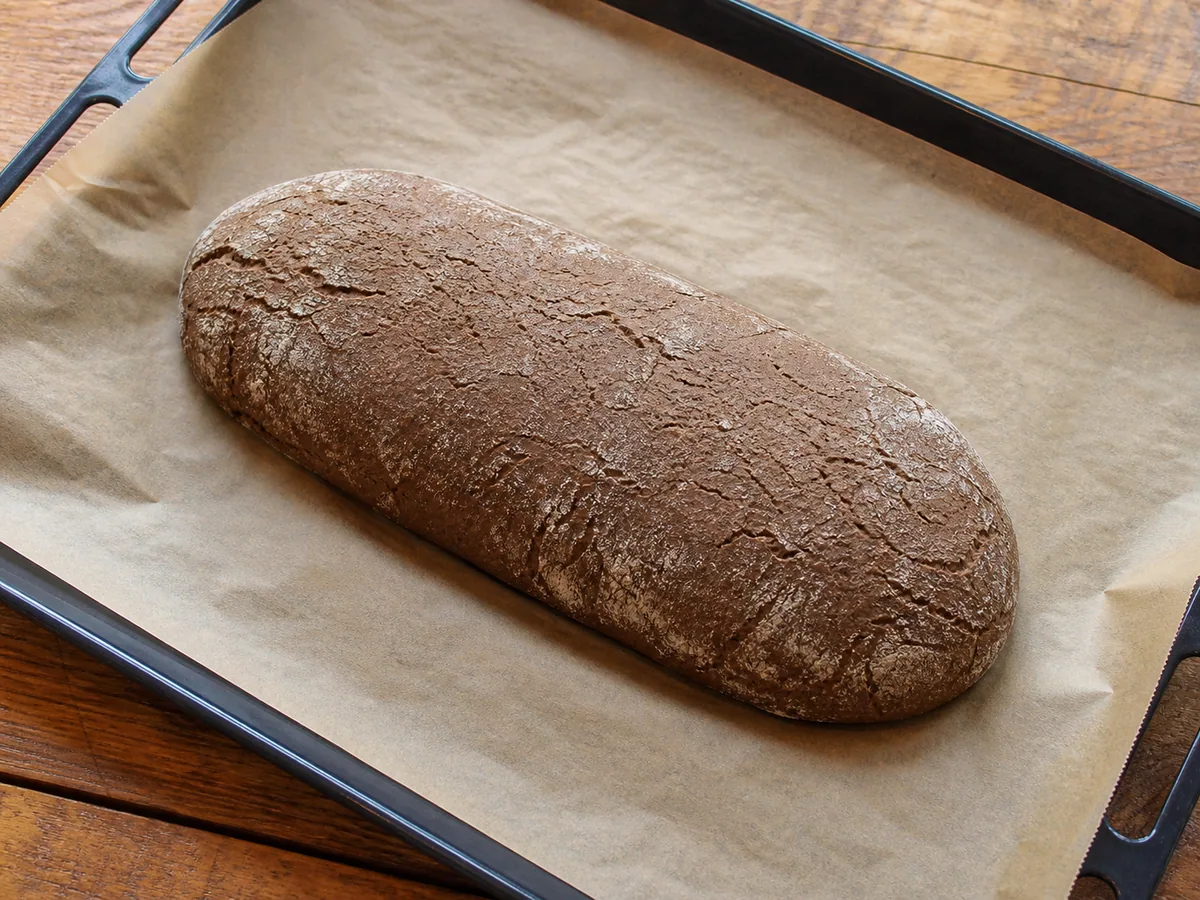
Set a sheet of baking parchment on a rimless baking sheet or sturdy board. Wet your hands and a bowl scraper, then ease the dough onto the parchment. Shape it into a 20 cm (8 in) round about 5 cm (2 in) high (for 8 servings), smoothing the sides without pressing out the air. For scaled batches, shape one or more loaves that keep a similar thickness rather than enlarging the diameter in direct proportion. Cover loosely and proof for 1 1/2 to 2 1/2 hours, checking at 1 1/2 hours. It is ready when the loaf looks slightly fuller and a web of small cracks begins to form. During the final 30 minutes, heat the oven to 230°C (450°F) with a heavy baking sheet or baking stone on the middle rack.
01:30:00Start the bake at high heat
Slide the parchment and proofed loaf onto the hot baking sheet or baking stone. Bake at 230°C (450°F) for 15 minutes to set the shape and begin developing the dark crust.
00:15:00Finish baking and check doneness
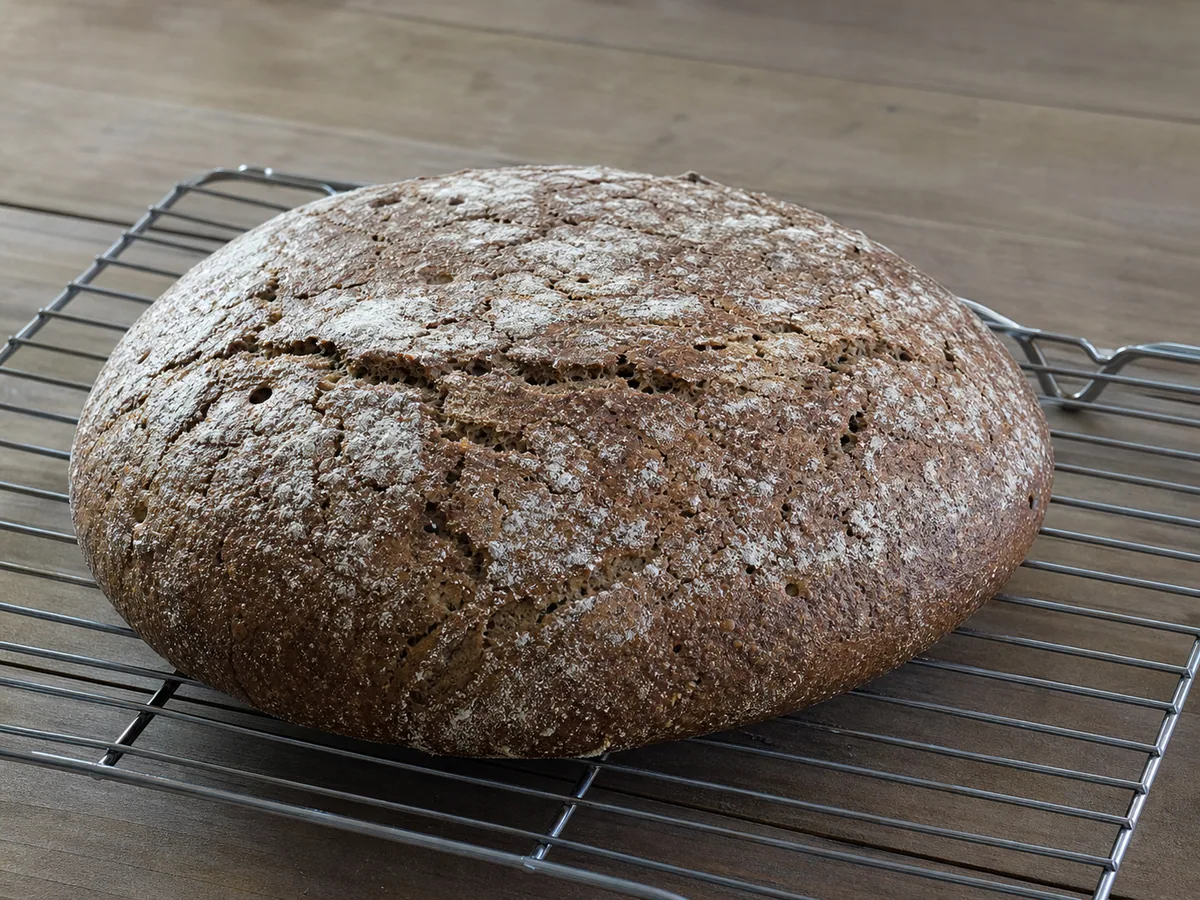
Reduce the oven to 200°C (400°F) and continue baking for 35 to 40 minutes, beginning the doneness check at 35 minutes. The crust should be deep brown and firm. Insert an instant-read thermometer through the side into the center; the loaf is ready at about 96°C (205°F). If the temperature is lower, bake for 5 minutes more and check again.
00:35:00Cool before slicing
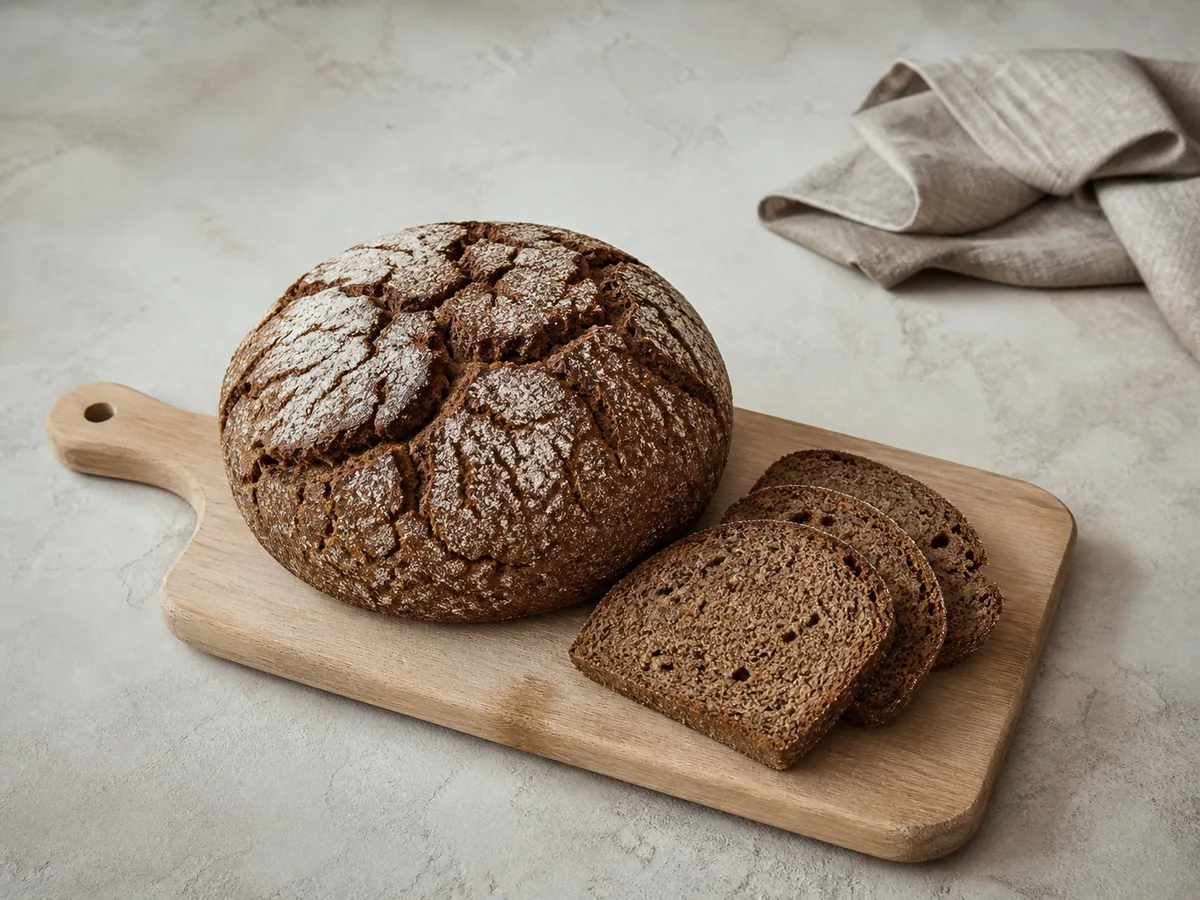
Transfer the loaf to a wire rack and let it cool undisturbed for at least 3 hours. This pause allows the rye starches to finish setting, so the crumb slices cleanly instead of turning gummy. Cut with a serrated knife and serve in thin or medium slices.
3:00:00


Smart Substitutions
- No rye starter? Feed a mature wheat sourdough starter with equal weights of whole rye flour and water for two refreshments. Use 150 g when it is bubbly and at peak activity; this keeps the starter at the 100% hydration assumed by the recipe.
- No whole rye flour? Use dark rye flour. The loaf will still be rye-forward, though the crumb and fiber content may differ.
- Cool kitchen? Place the covered dough in a gently warm, draft-free spot and judge readiness by bubbles and surface cracks rather than the clock alone.
- No baking stone? Preheat a heavy metal baking sheet and slide the parchment directly onto it.
Tips and Variations
- Use a starter that is visibly bubbly and recently fed; weak starter produces a dense loaf with little fermentation character.
- Wet hands, spoons, and scrapers before they touch the dough so shaping stays controlled without adding excess flour.
- Bake the crust darker than you would a pale wheat loaf; the deeper color supports the toasted, earthy rye flavor.
What Went Wrong?
- Dough shows no bubbles Give it more warmth and time. If it remains flat after several additional hours, the starter was probably not active enough.
- Loaf spreads during proofing The dough may be overproofed or unusually wet. Bake it promptly and shape the next loaf a little taller with slightly damp, not dripping, hands.
- Crust darkens before the center is ready Lower the oven by 10°C (20°F) and continue baking until the center reaches about 96°C (205°F).
- Crumb is gummy Confirm the loaf reached the target center temperature and allow the full cooling period before slicing.
Nutrition Estimate
- Fiber: 10 g per serving
- Sodium: 490 mg per serving
Nutrition disclaimer:This recipe is provided for general cooking information only. Nutrition values are estimates and may vary by ingredients, brands, preparation methods, and serving sizes. Check ingredient labels and follow appropriate food-safety practices. This content is not medical, dietary, allergy, or professional food-safety advice.
FAQ
Found an error or have a suggestion?
Help us improve this recipe. Send us your feedback and include the recipe name so we can take a look.